Here are a few fun makeup ideas for Halloween. These were created using LimeLight by Alcone’s Perfect Eyeliner. Use a little eyeshadow for color and you can create some great looks for your next Halloween party. You’ll love the look and feel of using makeup instead of face paint which can be uncomfortable and it can also clog your pores.
Painting
How to Paint With Shaving Cream
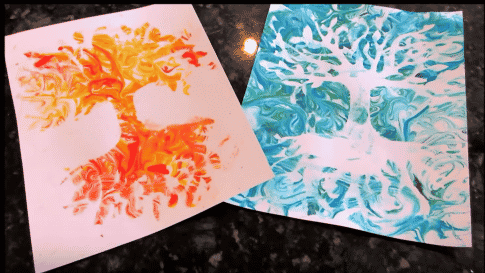
Make cool greeting cards or note cards by painting with shaving cream. You can create some fun designs with just a little shaving cream and paint.
How to Paint With Shaving Cream:
- Squirt shaving cream onto a pan, table, tray or workspace
- Add drops of food coloring, paint or ink
- Use a toothpick, skewer or chop stick to swirl a design in the shaving cream
- Lay a piece of paper over the shaving cream and press down lightly
- Lift-up the paper and then scrape off the shaving cream with a spatula, ruler or squeegee
That’s all there is to it. It’s so easy to do. You can also add stencils so that only a portion of the paint gets transferred to the paper.
Here is the tutorial from Her Art From the Attic that shows you exactly how to do it.
Supplies for Shaving Cream Paintings:Examples of Shaving Cream Paintings:
Finger Print Flowers and Butterflies
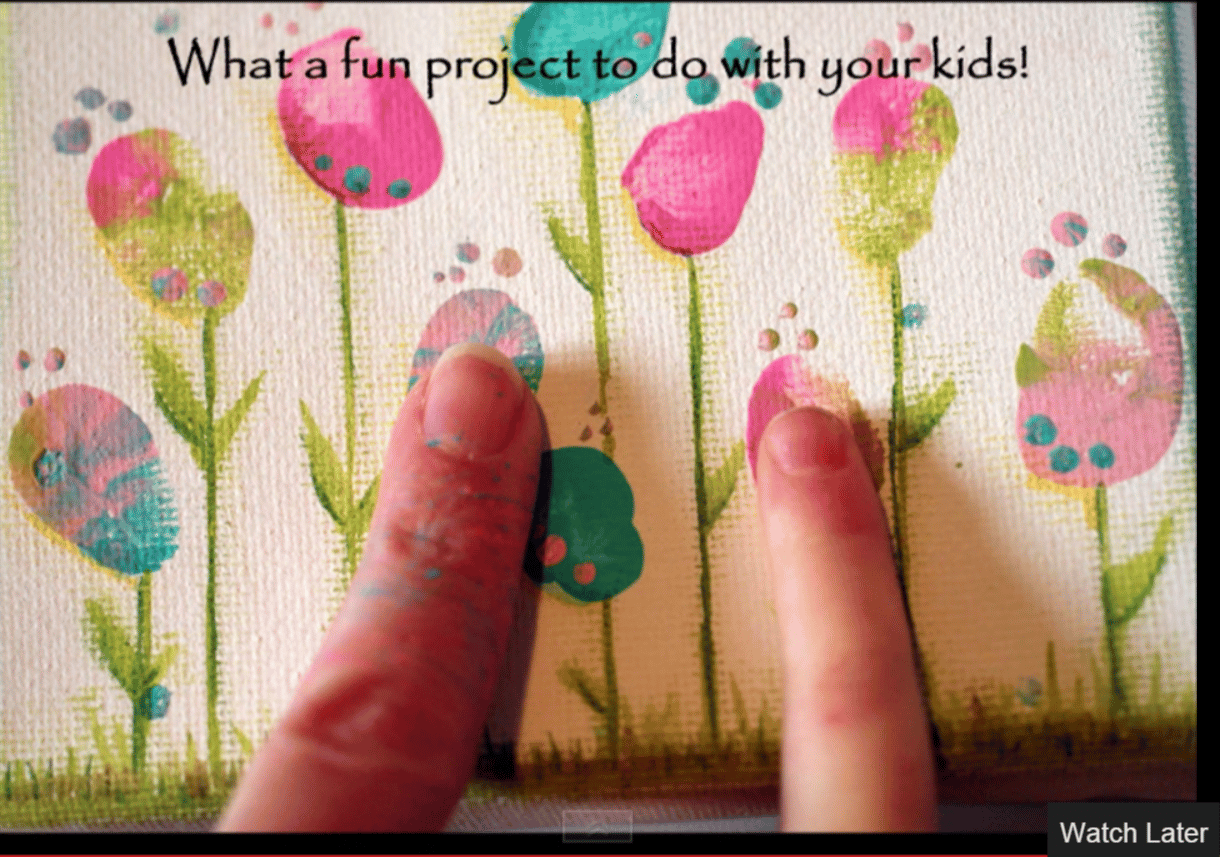
Here’s a craft idea that is perfect to do with the kids. Make a flower and butterfly canvas piece of art by using your finger prints. You’ll love getting your hands dirty to bring out your inner child. A fun craft that’s perfect to make for Valentine’s Day, Easter or Mother’s Day.
Supplies for Finger Print Flowers and Butterflies
Another reason why I like this craft is that you don’t need many supplies. This example was made using canvas, but you could certainly use paper stock too.
Canvas
Paint
Artist Pens like Faber-Castell
How to Make Finger Print Flowers
1. Squeeze paint into tray and mix colors around until you get a mix that you like.
2. Dip fingers in paint and then press finger prints onto canvas to make the flowers and butterflies.
3. Use pens to add the stems and detailing to the print
4. Use your fingers to smudge the lines and blend the paints as needed.
Step by Step Tutorial by Krista Vantol
I hope you have fun making your own finger print art.
Learning to Paint Watercolor Butterflies
Make your own note cards with watercolored butterflies that are really easy to paint. There’s nothing like a butterfly to brighten-up someone’s day and that’s why I think they are the perfect choice for note cards. That way you can use them for a Thank You note, or an “Anytime” card to let someone know you’re thinking of her. Whatever the occasion, these notes cards are the perfect fit. And these are an inexpensive gift idea too. All you need are watercolor paints, blank note cards and an angular paint brush.
Crafts to Make With Alcohol Ink
Have you added alcohol inks to your craft drawer yet? One day I saw a video showing a craft made with these liquid inks and I knew that I had to give them a try. And of course I was instantly hooked. I love the versatility of alcohol inks. You can use them to create paintings, mosaics, jewelry and so much more. Here is one of my favorite ways ways to use these inks.
Alcohol Ink Floating Background
With this technique, all you have to do is mix cold water with alcohol ink. You can then dip any type of item into the water. It’s great for making colorful gift tags, colored wooden pieces and beads for jewelry.
Here are a few examples of gift tags made with this technique. When dry, the tags can be used for stamping and inking.
You can create any color combinations you want. Have fun playing around with the amount of ink that you place in the water. Decide what background color you’d like and then add a drop or two of a bold accent color. It’s also fun to play around with the type of paper that you use.
These beautiful designs show you the depth and variety you can achieve with alcohol ink. By varying the colors and amount of ink added to the water, you can really play around with the designs that you can achieve with this method.
You aren’t limited to simply using paper and cardstock with this method.
These beautiful ceramic beads were created with this technique. The beads were varnished with Decoart Triple Thick Glaze to give them the protective, high-gloss finish.
I hope that you have fun making your own designs using this fluid background technique. I can’t wait to make some new cards to use for the upcoming holiday season.