• Skip to primary navigation
  • Skip to main content
  • Skip to primary sidebar
  • Skip to footer
  • Home
  • About Me
  • Contact Us
  • Privacy Policy

Arts to Crafts

Fun Craft Ideas for All Ages

  • Home
  • Holiday Crafts
  • Gift Ideas
  • Crafts for Kids
  • Shop Craft Supplies
  • Shop Handmade Gifts

Holiday Crafts

Fun Halloween Lantern Decorations

by Kristen Leave a Comment

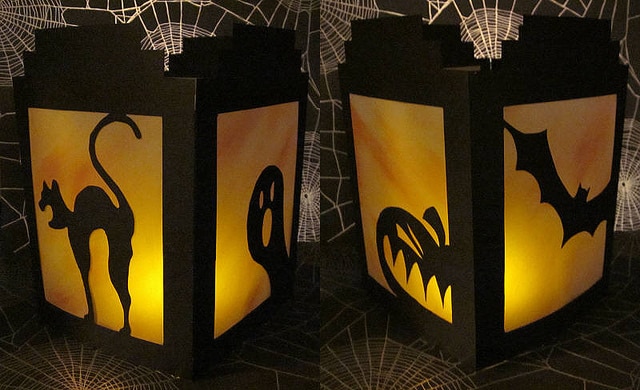
I love all of the fun and easy lighted Halloween crafts that you can make for the holiday.  These ideas can be used to decorate the inside and outside of your home to welcome trick or treaters.  Use these ideas as a starting point and then personalize each one to give it your own twist.  This way you can make friendly, or spooky, Halloween decorations to fit your style.

Halloween Lanterns

Halloween-lanterns

Image Source: frykitty on Flickr CC 2.0

You can make pretty Halloween lanterns and displays using milk cartons, or by simply building your own design using cardboard and paper.  Here are a few ideas for how to create your own Halloween Lanterns or decorations using milk cartons.

  1. Use a clean and dry milk carton, juice carton, or cardboard box.
  2. Cut out a rectangle on each side of the box, leaving about a 1″ border all the way around.  You are essentially creating a picture frame on each side of the box and your Halloween scene will go in the middle .
  3. Paint the outside of the box black, or whatever dark color you’d like.  Black paint is ideal because it adds to the Halloween scene and gives it the evening silhouette you want.
  4. Cut out a piece of wax paper, parchment, or transparent paper that will allow light to shine through it.
  5. Stencil a design onto the paper, or you could also cut out a design and glue that to the paper.  This is where you can use your imagination to create a spooky or fun design.  Some ideas include making a jack-o-lantern face, or a witch riding a broom. Black construction paper is perfect for creating cut-out designs and a sharpie marker can be used to hand-draw a design too.
  6. Tape or glue the paper with the design to the inside of the box.  You put the paper on the inside of the box so that the carton creates a frame around it.
  7. Add an electric tea light, or LED light to the inside to light-up your decoration.

TIP:  Do you have solar powered garden lights along your front walkway?  Charge the lights during the day and then on Halloween night go out and add the milk carton decorations over the light for a glow-in-the-dark Halloween decoration that will look really cool!

Milk Carton Halloween Village

You can use the same technique outlined above to create your very own Halloween village.  This project is lots of fun to put on display on your front porch or entrance way.  It will be the first thing that visitors see when knocking on your door for trick or treating.

Milk Carton Halloween Display

Image source: puuikibeach on Flickr CC 2.0

I hope you enjoy making your own Halloween lanterns and light-up decorations.  These are fun projects to do with the kids and you can make these crafts as easy, or complex, as you’d like.  Get creative and build your very own Halloween light-up display.

Share

Filed Under: Crafts for Kids, Holiday Crafts Tagged With: crafts for kids, easy crafts, halloween

Halloween Mason Jar Candles

by Kristen 2 Comments

Candles are a fun way to decorate the inside and outside of your house for Halloween.  You can make your own Halloween decorations using glass jars and a little creativity.  Add a spooky ghost, or witch on a broomstick to the mason jar to create a Halloween mason jar candle that will add just the right touch of spookiness to your decor.

Halloween Mason Jar Candles

Supplies Needed to Make a Flaming Glass Jar Halloween Candle:

  • Any clean glass jar.  This can be a mason jar, food jar, or jelly jar that has been thoroughly cleaned and dried.
  • Mod Podge
  • Food coloring
  • Masking Tape
  • Tea light or candle

Instructions for making a Glass Jar Halloween Candle

  1. Paint the inside of the jar orange.  You can do this easily by mixing a little bit of mod podge and food coloring in the jar.  Mix it right in the jar and then swirl it around to cover the inside of the jar.  Let dry overnight.
  2. Rip of pieces of masking tape (varying the length and width of each piece) and attach to the outside of the jar.   You’re trying to make it look like flames.  Place the tape along the bottom half of the jar, with the masking tape placed vertically to resemble the flames.
  3. Paint the outside of the jar with black spray paint.  Let dry.
  4. Remove the masking tape.
  5. Insert a battery-operated tea light, or candle, into the jar and you now have a candle that has the black and orange colors of Halloween, plus it looks like flames.  Very cool!

You can also add some ribbon to the top of the jar, or any additional design elements that you think jazz it up a bit.  I’ve outlined the basic steps, but you can get really creative with this one.

Here are a few pictures to show you how easy it is to make this flaming Halloween candle.

Taping Halloween Mason Jar Candles
Add masking tape to candle to make it look like flames.
Spray Painting Mason Jar Candles
Paint with black spray paint.
Halloween Mason Jar Candle
Finished Halloween candle!

Here is a video from expertvillage that shows you all of details for how to make these great candles.

Here are a few more of my favorite Halloween candle ideas.

Halloween Jar Lanterns

Halloween jar lanterns photo courtesy of frykitty on Flickr.

Mummy Candles

DIY mummy candles photo courtesy of Cy-V on Flickr.

Bat Candle for Halloween

Image of bat candle courtesy of slgckgc via Flickr.

Share

Filed Under: Crafts for Kids, Holiday Crafts Tagged With: candles, crafts for kids, easy crafts, halloween, halloween crafts

Ghost Milk Jug Craft for Kids

by Kristen 1 Comment

Light up your walkway this Halloween with cute Halloween luminaries made with milk jugs.  This is a fun Halloween craft for kids.  With recycled milk jugs and a little creativity, these outdoor decorations are a fun and inexpensive way to decorate your home for the holiday.

Milk-Jug-Ghosts

How to Make a Milk Jug Ghost Luminary

Supplies Needed:

  • Milk Jug
  • Electric tea light
  • Scissors
  • Black marker

Steps Involved:

  1. Rinse out the milk jug and let it dry.
  2. Use a black marker to draw a ghost face.
  3. On the back of the milk jug, right underneath the handle, cut out a hole to insert the tea light.
  4. Turn on the electric tea light and insert into milk jug.

The face, or decoration, on the milk jug can be any design.  So kids can get creative and design a black cat, a jack-o-lantern face, or any Halloween picture they like.  Just be sure to use an electric tea light for this project, as a real candle would certainly be a fire hazard.

Happy crafting and Happy Halloween!

Video Tutorial for Milk Jug Craft

This video by BunnieClaire walks you through all of the steps for creating these Halloween decorations.

Supply Ideas

Battery Operated Tealight CandlesBattery Operated Tealight Candles

Remote Controlled Rechargeable Tea LightsRemote Controlled Rechargeable Tea Lights

Share

Filed Under: Crafts for Kids, Holiday Crafts Tagged With: crafts for kids, diy deorations, halloween, halloween crafts, outdoor crafts

DIY Mothers Day Gift Idea

by Kristen Leave a Comment

Make a painted cup or mug for Mother’s Day and every day your mum will enjoy this personalized gift.  One of the reasons why I love this gift idea is because a personalized mug can be made lots of ways.  You can use markers or paints to create a truly memorable gift.  Write a simple message on the mug to let her know how much you love her, or paint something special.  No matter what you do, she’ll love it.

Mothers Day Gift Idea

Personalized Painted Mug Tutorial

Share

Filed Under: Crafts for Kids, DIY, Gift Ideas, Holiday Crafts Tagged With: coffee mug, gift ideas, mothers day gift, personalized, personalized gifts

Mothers Day Flower Mug Bouquet

by Kristen Leave a Comment

Make your mother a bouquet of flowers that she can reuse once Mother’s Day has passed.  With this mug bouquet, she’ll be able to use the mug and the artificial flowers all year long.

Although this video shows you how to make a flower mug bouquet, one of the things I like best about it is the technique for wrapping the gift with shrink wrap.  It’s a great tip that can be used for any present you may have, whether’s it’s for Mother’s Day, a birthday, or Christmas.

This tutorial uses a premade mug, but how about if you gave her a personalized mug?  Now that would be an extra special gift that mum will really love.  This gift idea is perfect for any special person in your life, so an Aunt, Grandmother, or teacher would also love this gift.

Flower Bouquet Tutorial

Share

Filed Under: Gift Ideas, Holiday Crafts Tagged With: gift ideas, handmade gifts, holiday crafts, mothers day

  • « Go to Previous Page
  • Go to page 1
  • Interim pages omitted …
  • Go to page 3
  • Go to page 4
  • Go to page 5
  • Go to page 6
  • Go to page 7
  • Go to Next Page »

Primary Sidebar

Connect With Me

  • Facebook
  • Instagram
  • Pinterest
  • Tumblr
  • Twitter

E-mail Newsletter

More to See

Craft Gifts

Best Craft Gifts for Any Age

DIY Gift Idea

DIY Gift Idea For Kids

Browse Crafts

  • Clay
  • Comfort Crafts
  • Crafts for Kids
  • Crochet
  • Decoupage
  • DIY
  • Embroidery
  • Fabric & Upcycling
  • Featured
  • Gift Ideas
  • Giveaways and Contests
  • Glass
  • Holiday Crafts
  • Jewelry
  • Knitting
  • Mosaic
  • Needle Felting
  • No-Sew
  • Painting
  • Paper Crafts
  • Sewing
  • Stenciling

Footer

Recent

  • Crochet Gnome To Make for Christmas
  • Best Craft Gifts for Any Age
  • DIY Gift Idea For Kids
  • Thanksgiving Place Cards
  • Halloween Makeup Ideas

Search

Tags

amigurumi amigurumi patterns Christmas crafts christmas gift ideas clay clay polymer clay tutorial crafts crafts for kids crochet crochet patterns cross stitch decoupage decoupage furniture diy diy gifts diy jewelry easy crafts embroidery fabric fabric crafts flowers free crochet patterns free patterns gift ideas halloween halloween crafts handmade gifts handmade jewelry holiday crafts jewelry knitting mosaic mothers day no sew painted glass painting paper crafts sewing sewing patterns stenciling thanksgiving tutorial upcycling vase

Copyright © 2022 ArtstoCrafts.com